by JRinTawa Updated 11th February 2011
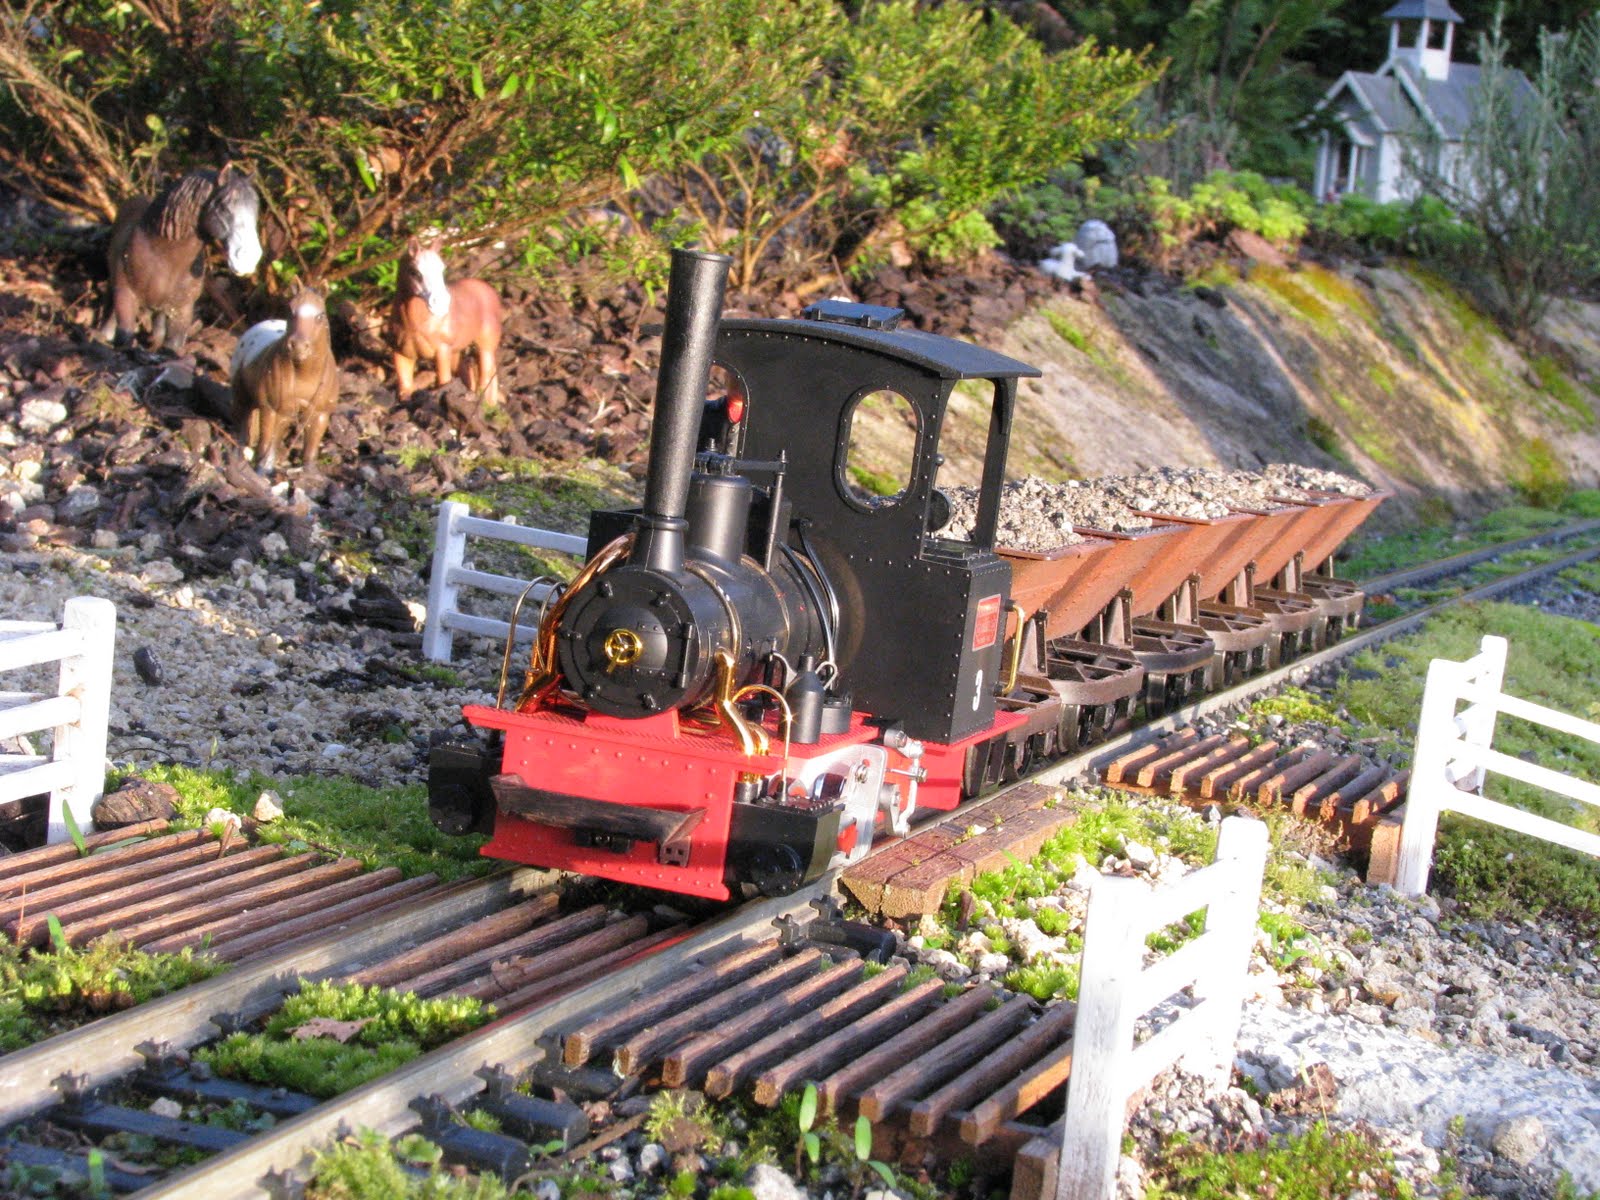
Following typical New Zealand railway practice I have constructed and installed cattle stops to either side of a level crossing on the H&MGR. The wood has been ripped down from Kwila hardwood decking on a full size bench saw. Rather a lot of off cuts are generated to ensure safe use of the saw. I.e. do not try and save timber, else you fingers will get way to close to the saw blade!
Plan & Elevation - Basic Dimensions
The timber I used was 19mm thick so that set the depth of the main beams, and as such is not critical, but has turned out to look about right once installed.
Scale wise I work to approximately 1:24 so you may need to beef up the width and length for large scales. Not the 3mm width of the stop bars matches the width of my saw blade, the reason why will hopefully become apparent as I detail the construction. Joints are notched glued and pinned, or in the case of the side fenced mortised and glued.
Plan
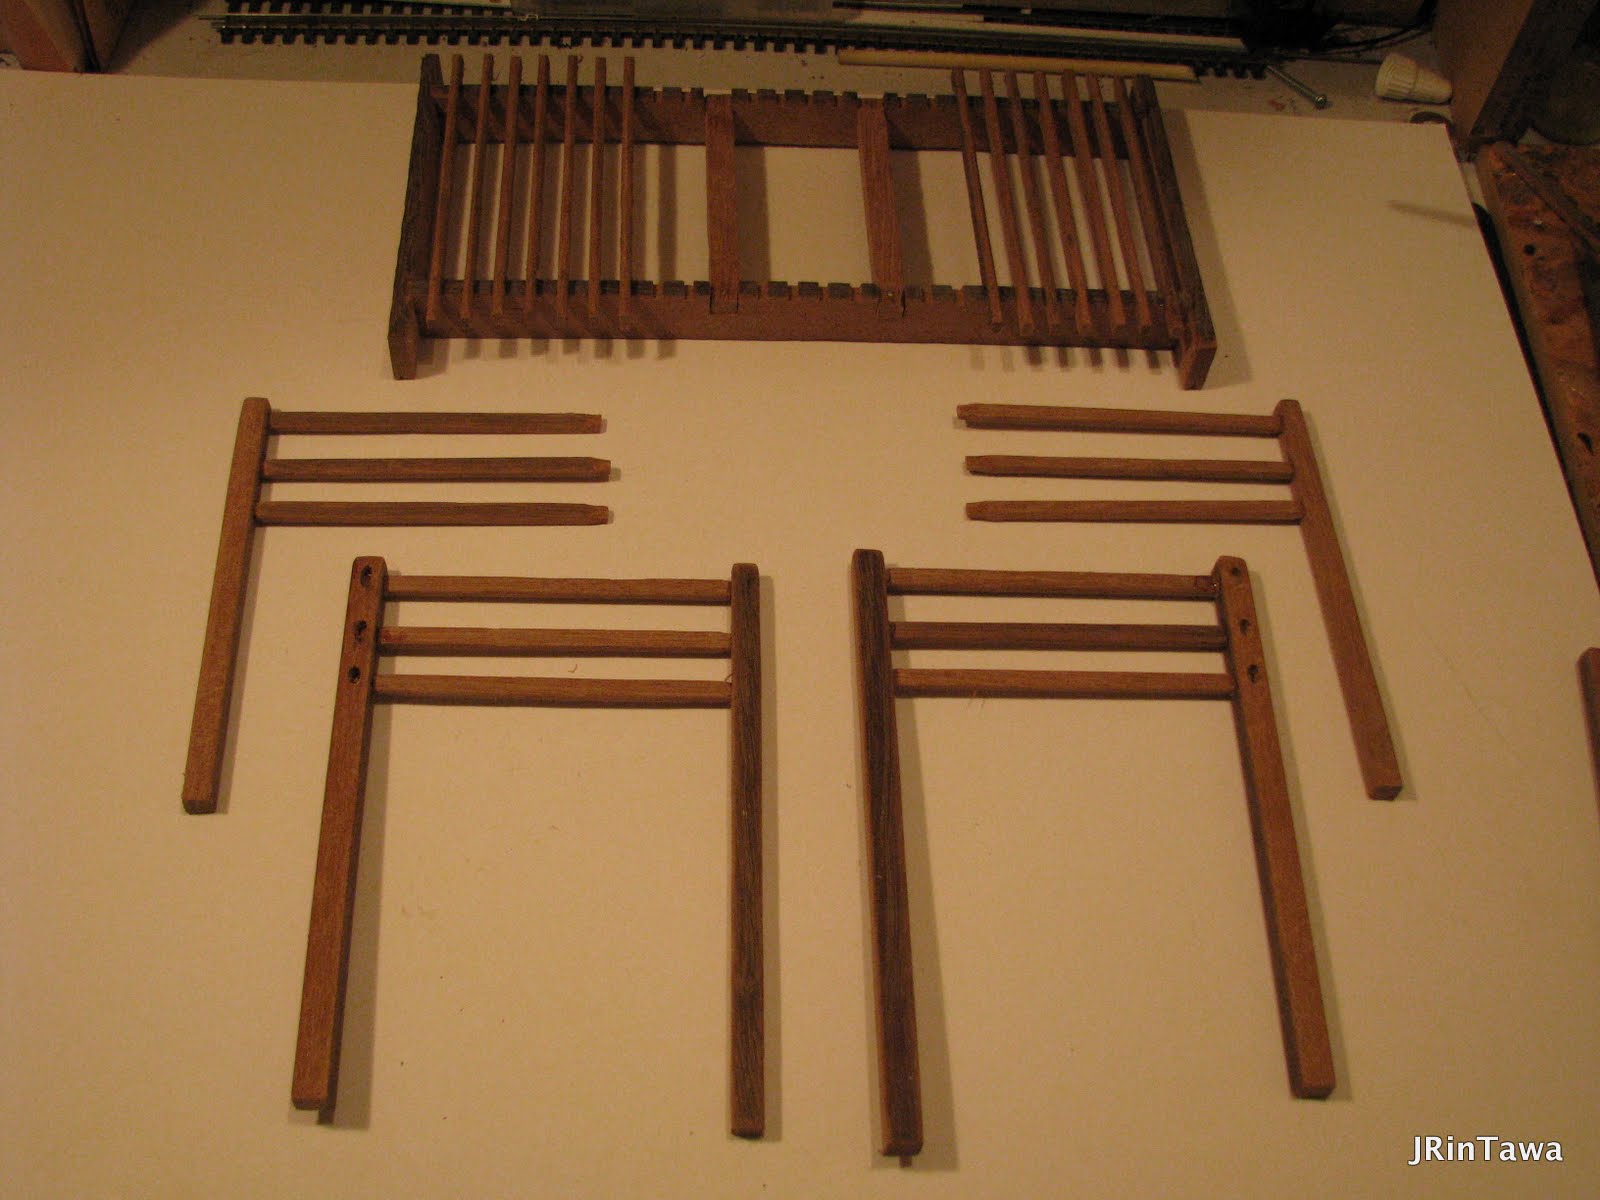
Off site (in the workshop) assembly
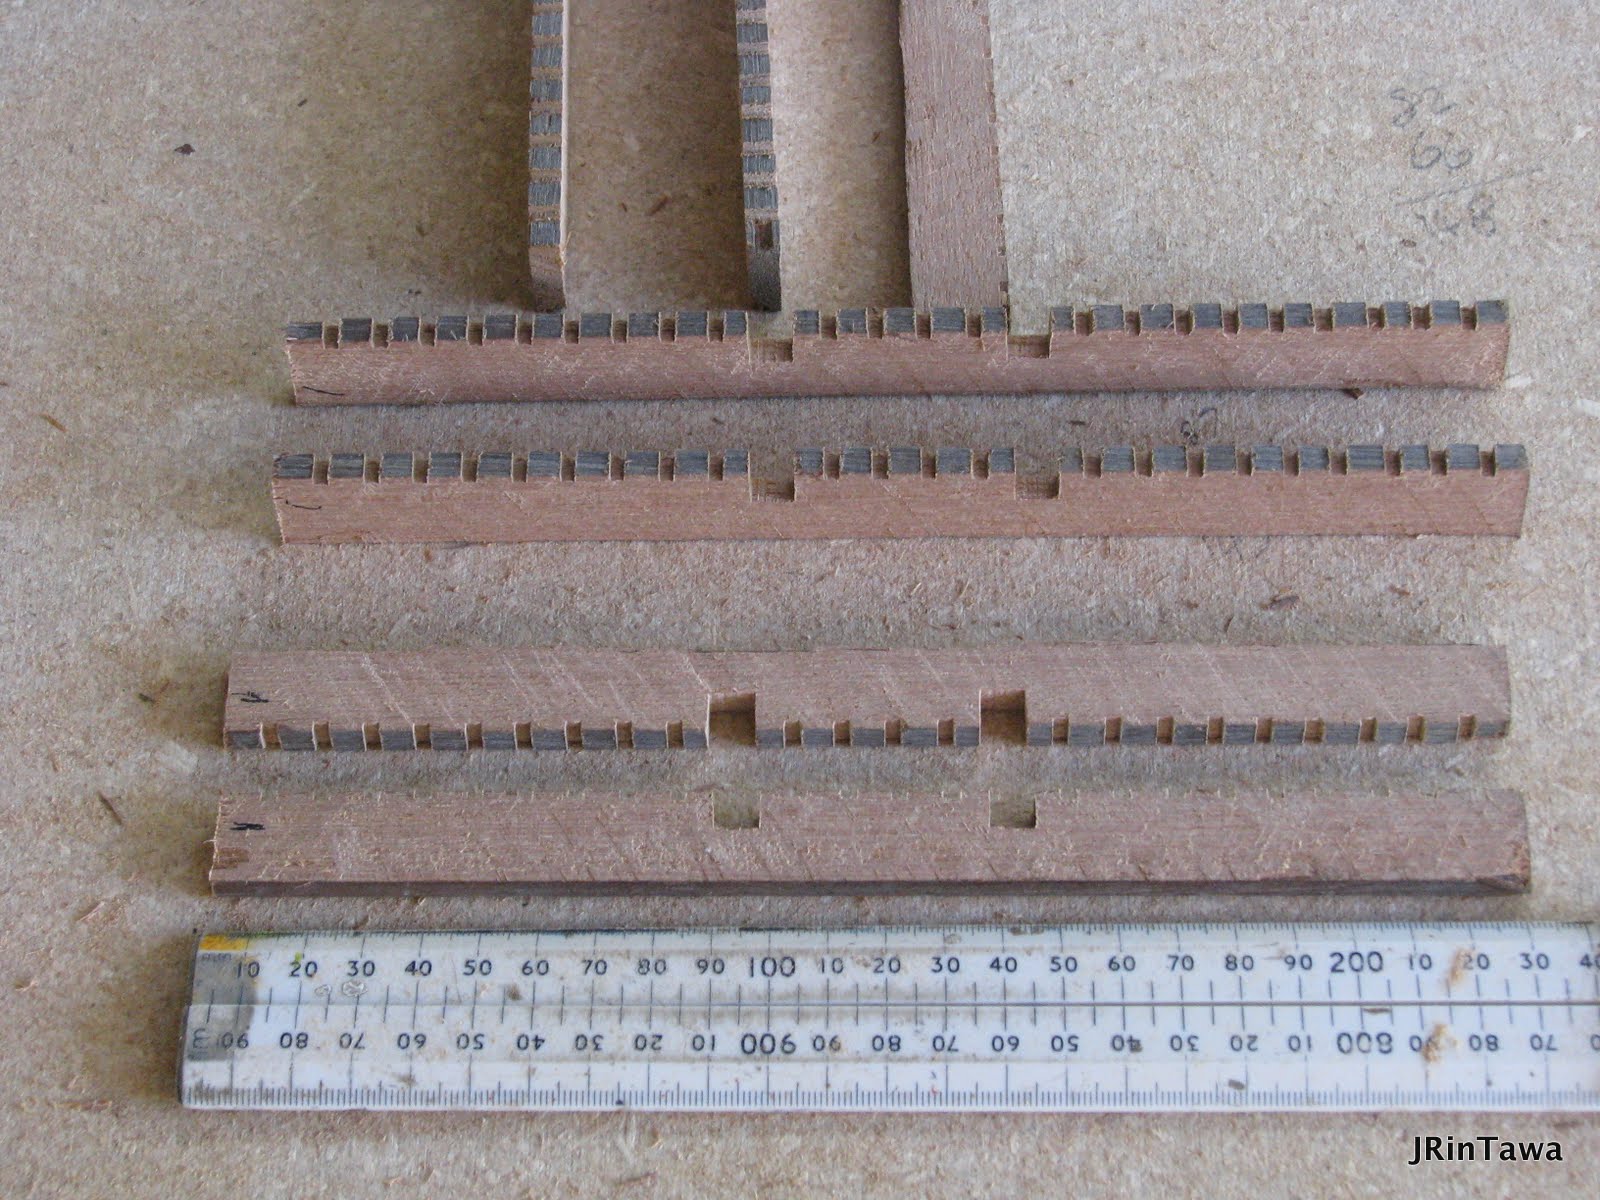
We start with cutting slots for stop bars and notches for rail beams in a full piece of decking timber, preferably some 400-450mm long.
The rip the decking timber to 6mm strips and cut the 230mm long traverse beams.
From the off cuts the required 2mm deep 6mm wide notches are cut and cut to 120mm long for the side beams.
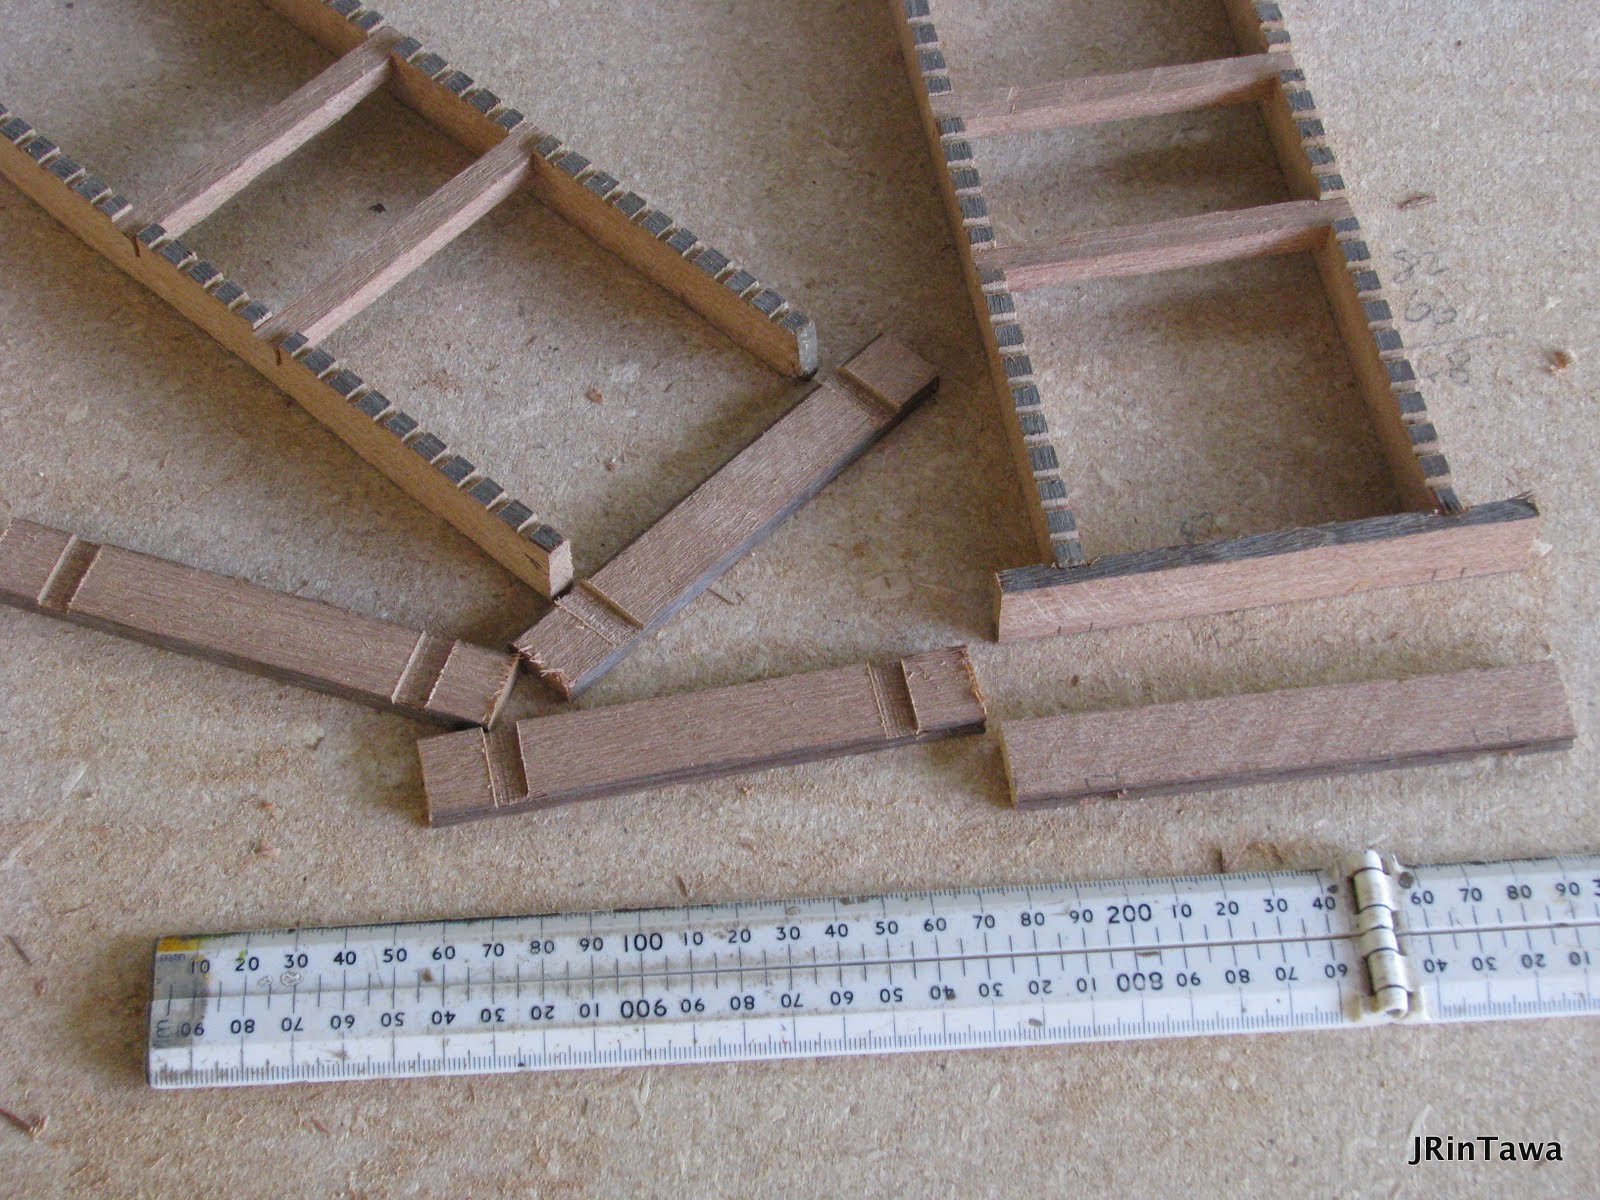
The basic frame is now dry fitted, 8x8x8mm long rail beams are also dry fitted having been ripped down from more decking timber.
The main frames are now glued and clamped up in the trusty Black & Decker Workmate.
Check for square with a builder's square and check measure the diagonals.
Once the glue is dry I pin the joints (predrilling undersized holes and gluing pins).
The main frame and rail beam pinned with panel pins (small nails).
The outside stop bars are glued in and pinned with 0.65mm dia headless brass pins
(well pin offcuts left over from pins used for rivets on another project.)
Fences
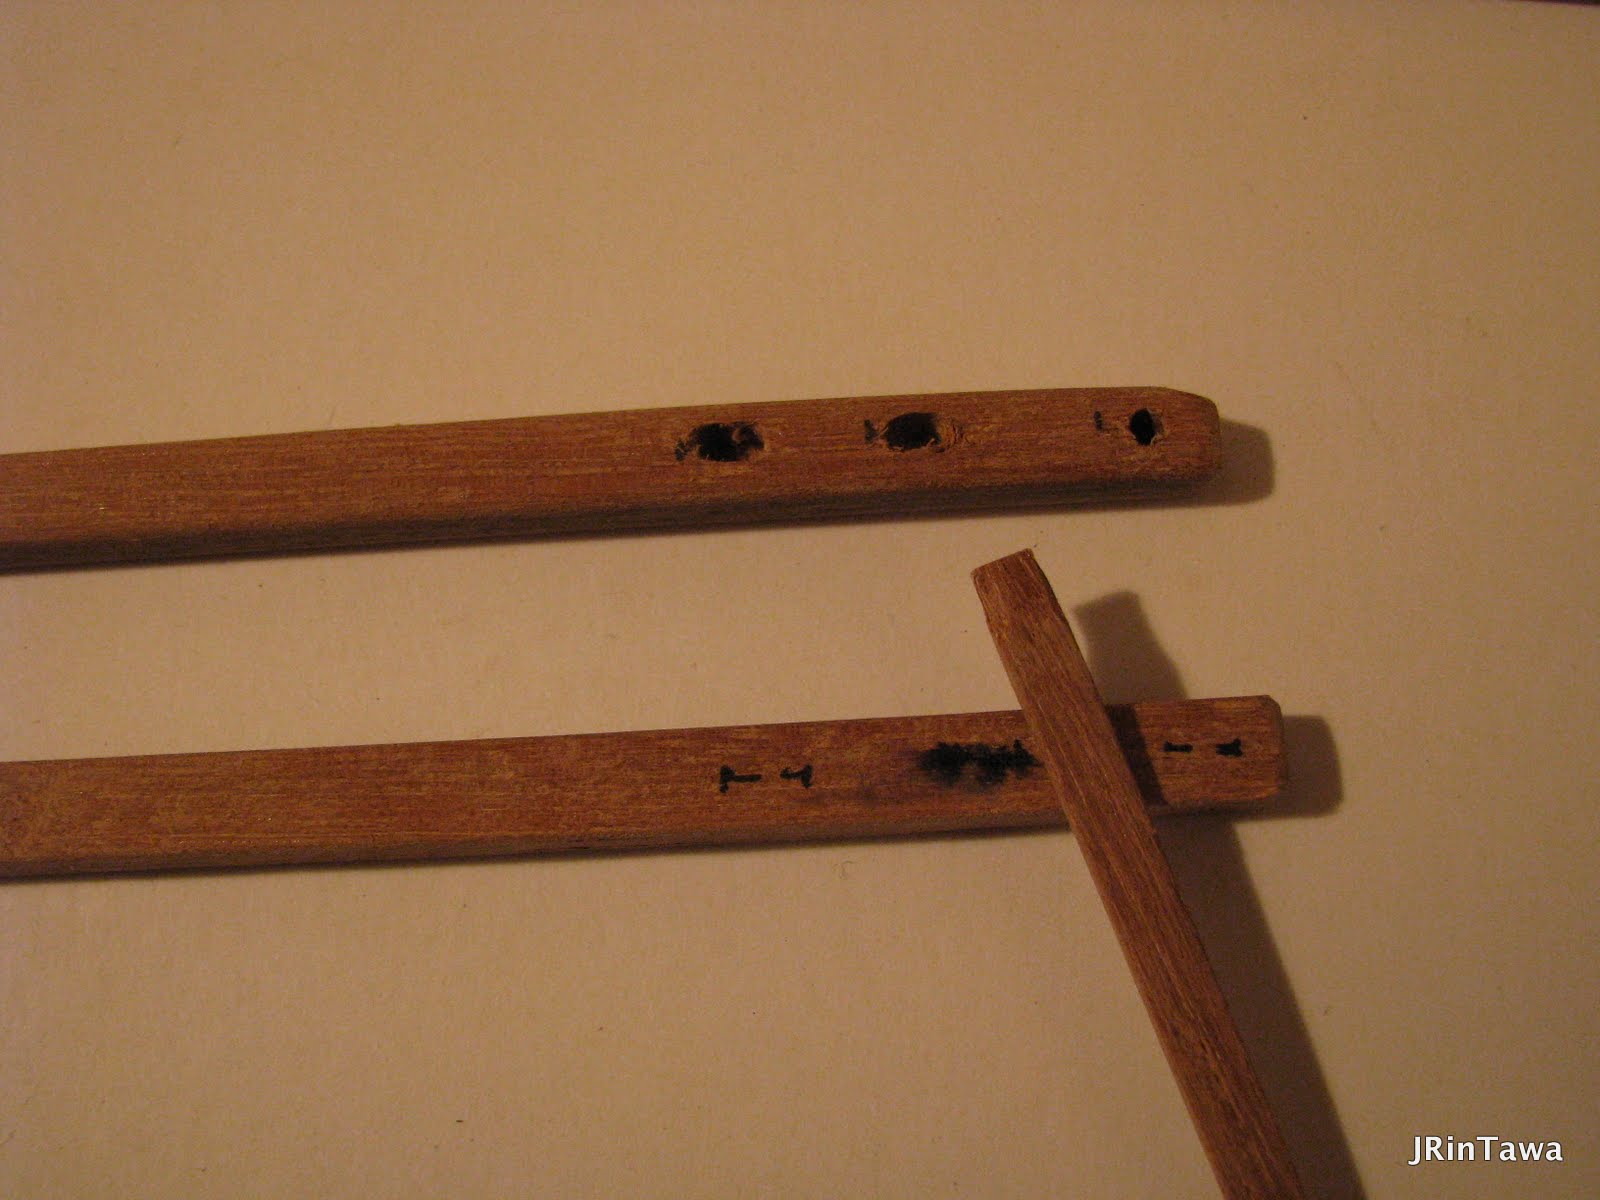
Another pre-asembly phase is to cut, sand and assemble the fences that go on the end of each cattle stop.
Fence posts are 8x8x150mm long, they are long to be sunk into the ground as you see later.
The posts require
slots to make a mortise joint with the fence rails. The top post shows the steps, drill one 3mm dia hole, then a
second, then trim up with a craft knife so you got a roughly 6mmx3mm oval
hole. The ends of the rails are
shaped with a craft knife to slot tightly in. The rails are at about 16mm centres, i.e. 10mm between fence
rails
The assembled fences, which will be given a deliberately rough coat of white paint before final installation in the garden.
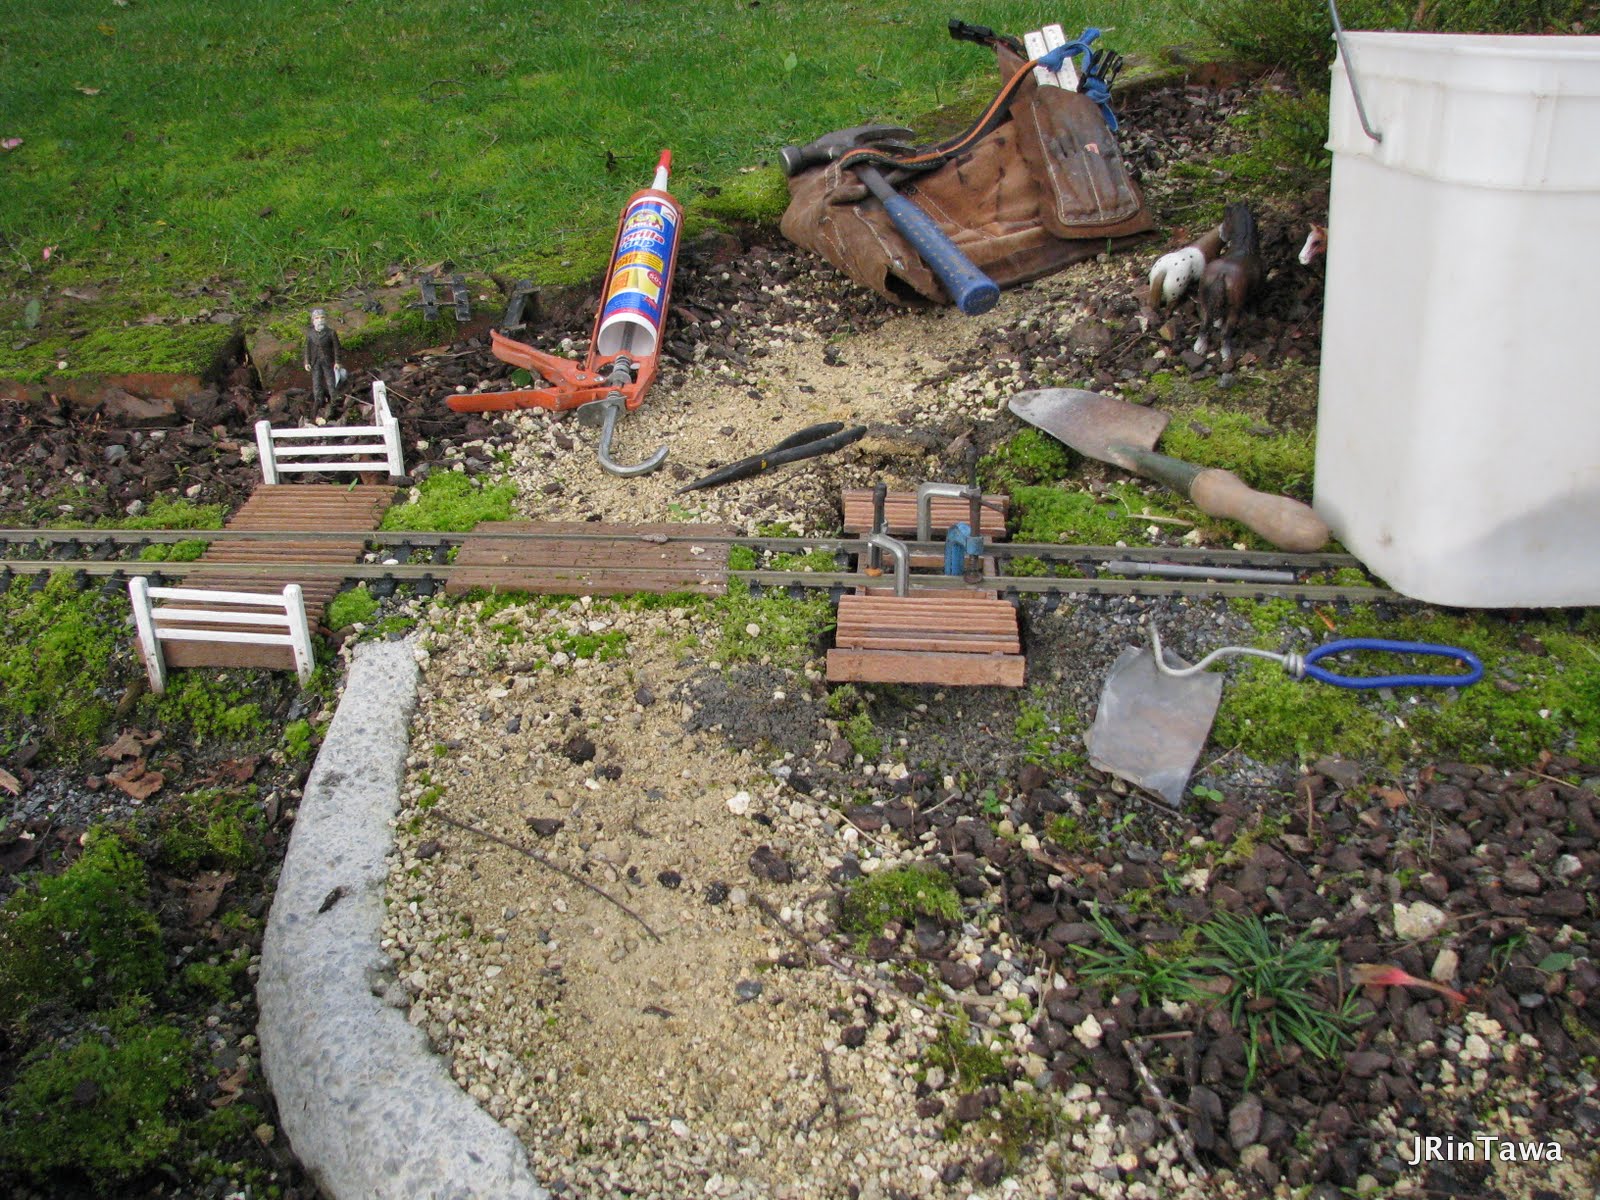
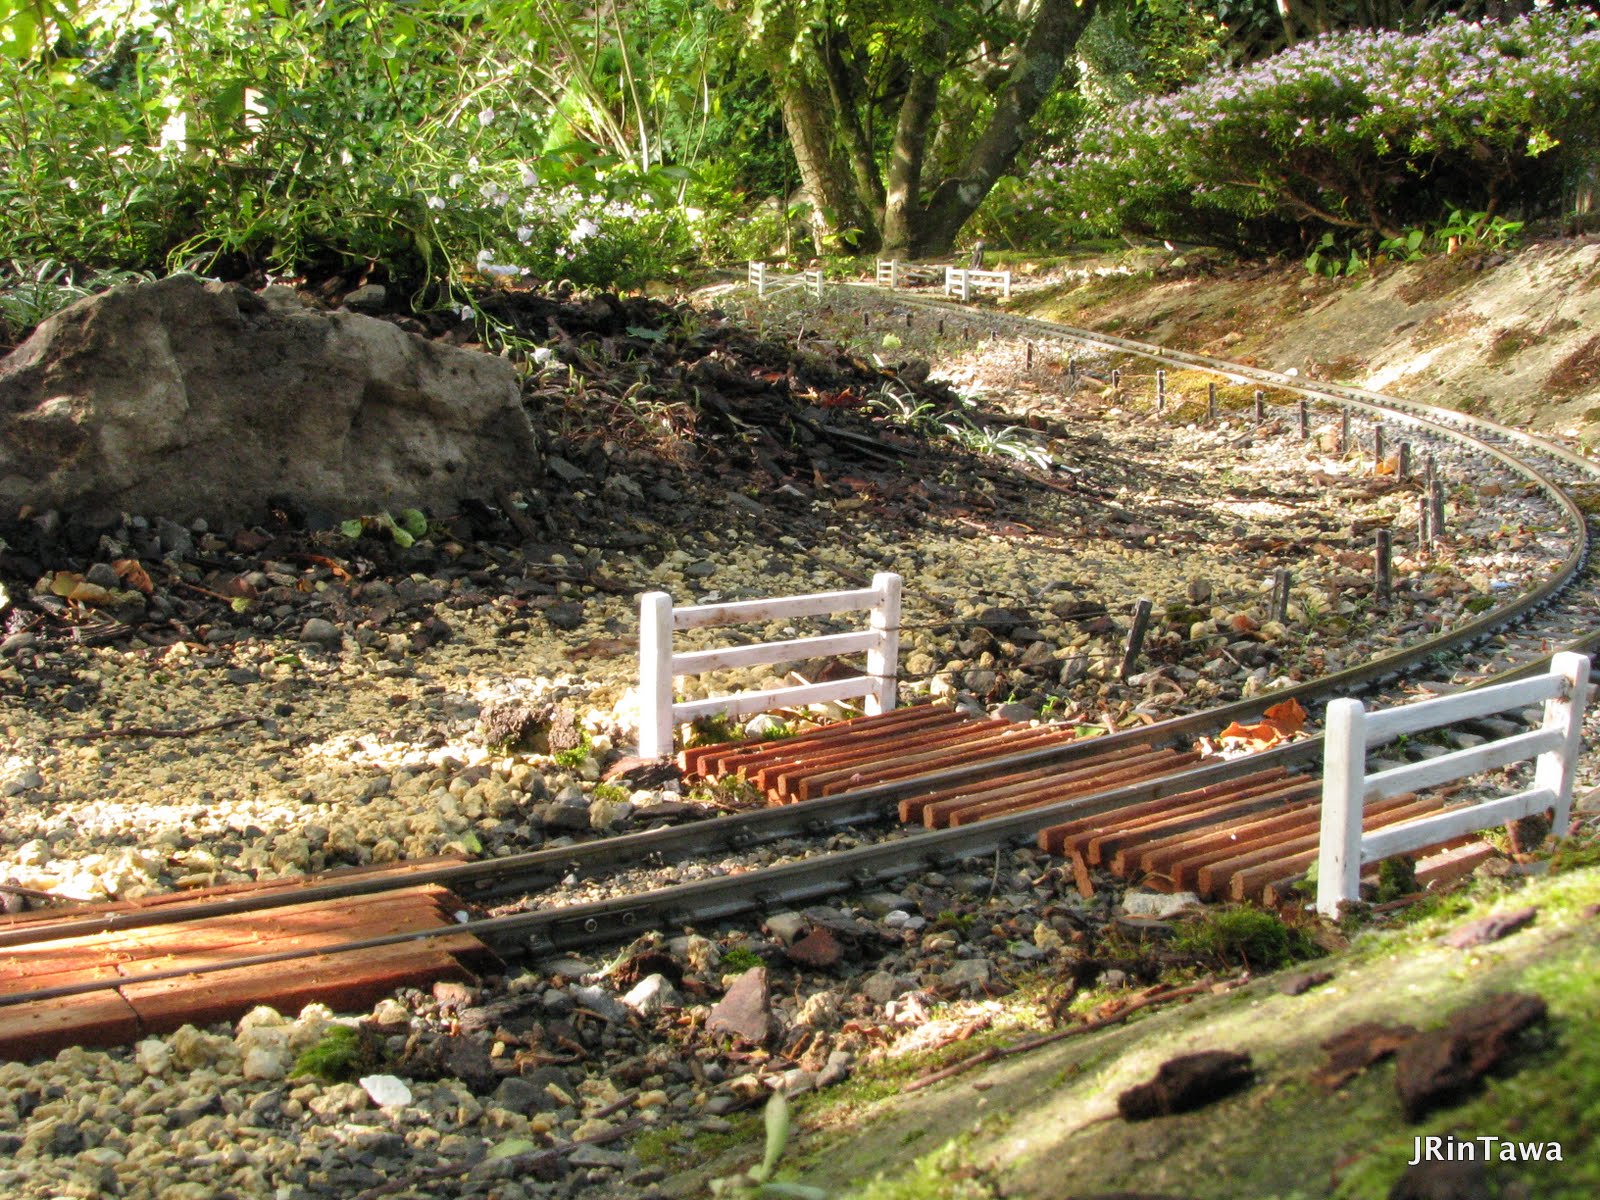
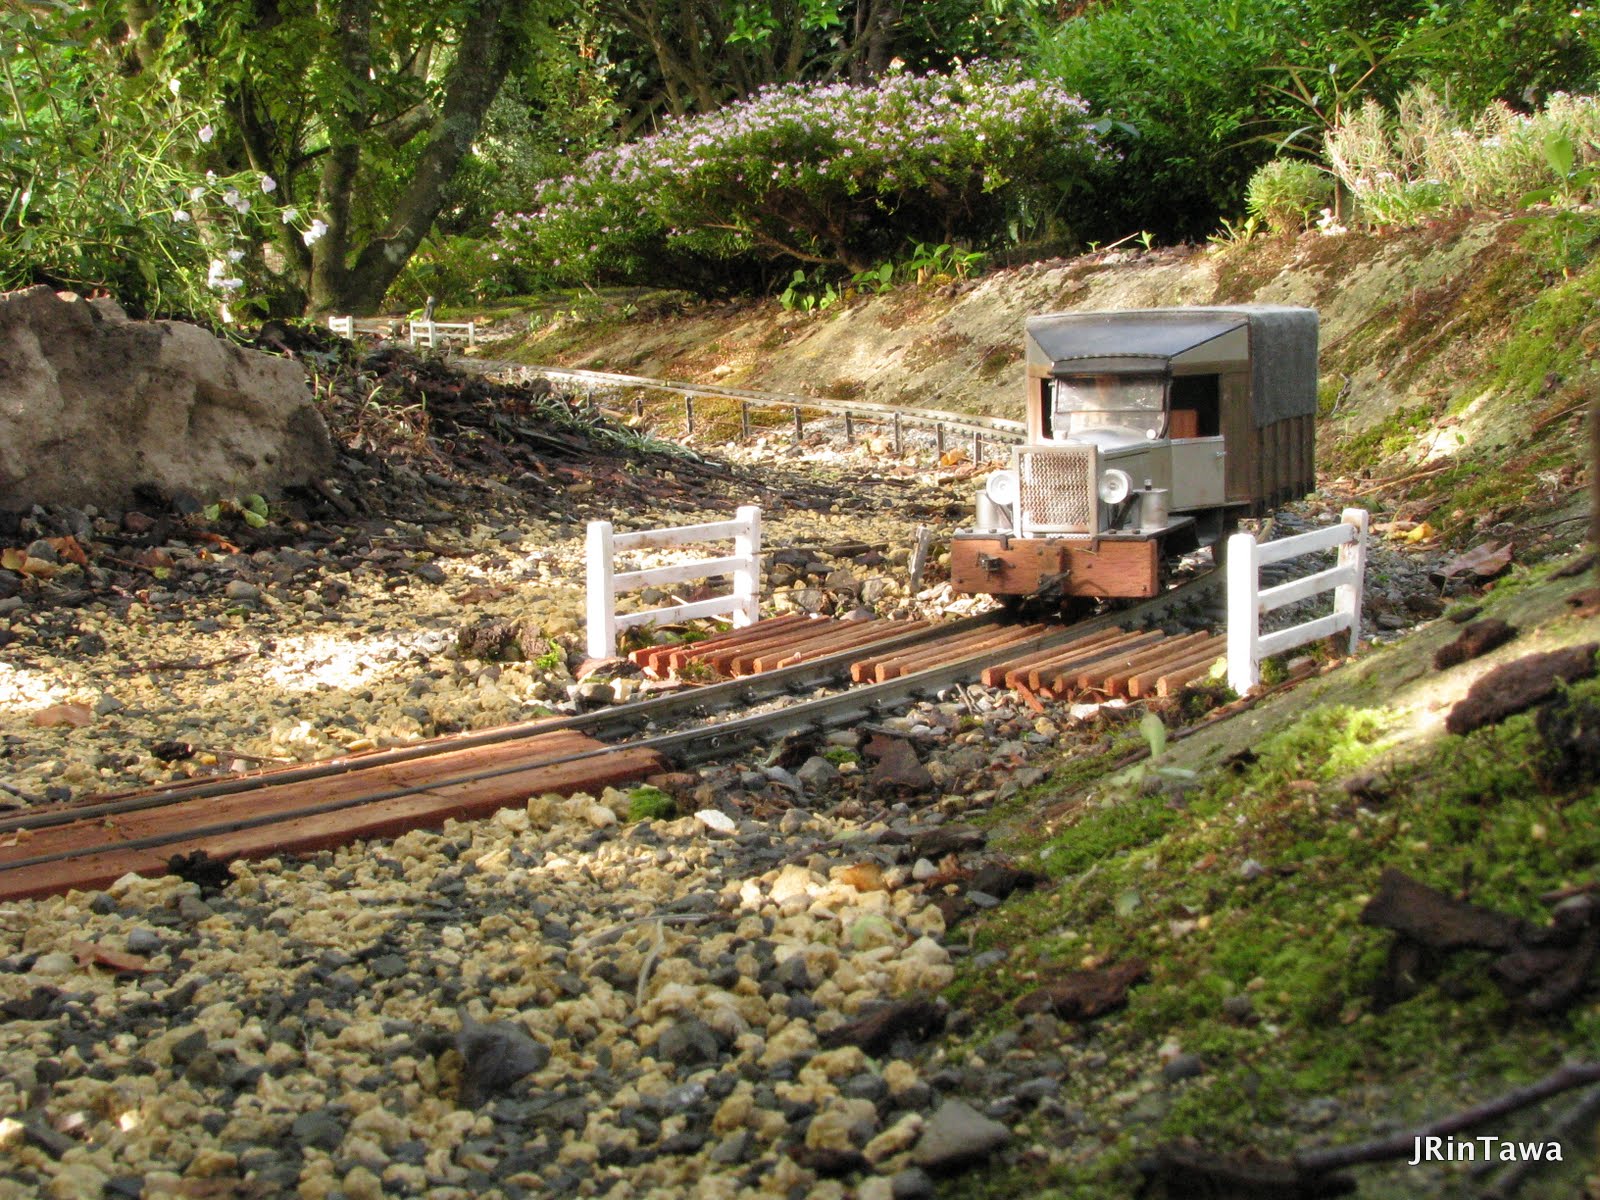
Installation on the Railway
First dig out a trench
larger than the final pit so you can comfortably cut away 3 sleepers and clean
the underside of the rail. Next slide the cattle stop into place, run a bead of builder’s outdoor adhesive
on top of both rail beams and clamp into position to dry. And as the say "to the left is one I prepared earlier"!
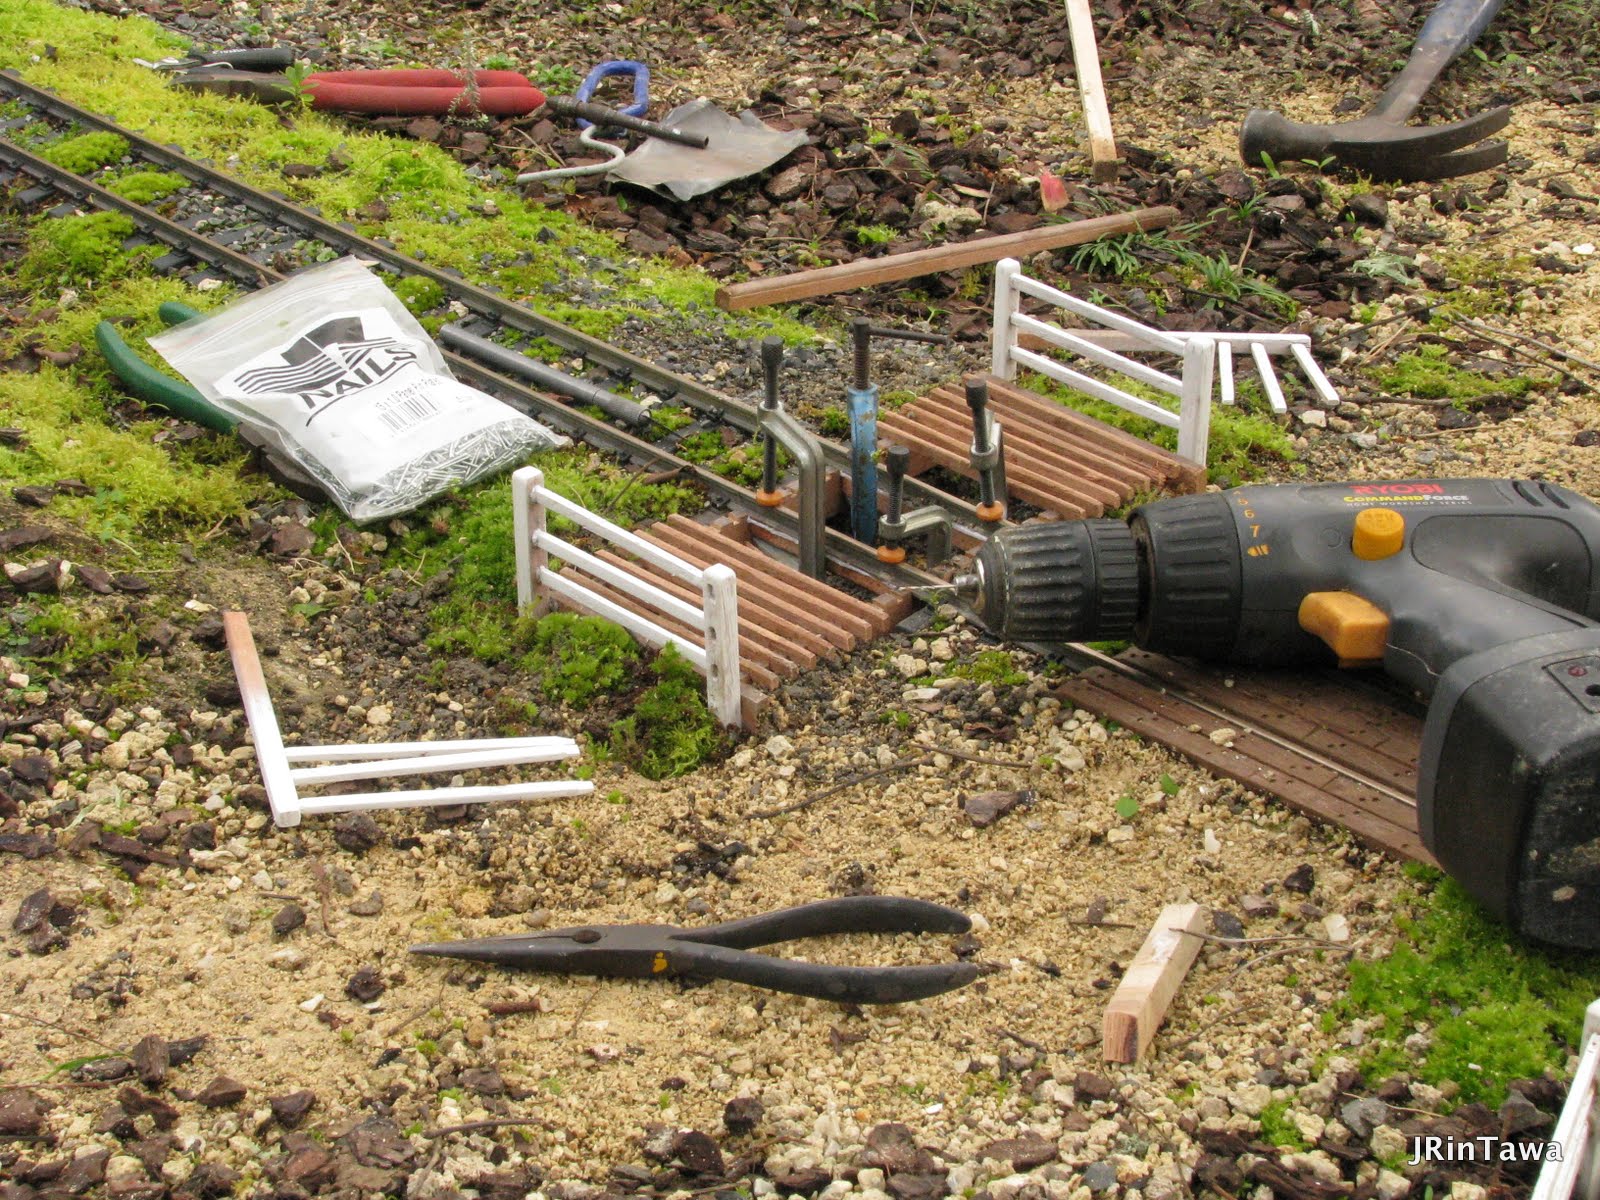
Installing the end
fences is next and is tricky. I used piece of timber
some 10x10mm to punch postholes deep into basecourse and clay subgrade under
the railway into which the fence posts are installed. It takes a couple of goes to get the postholes in quite the
right place so the end fences go in nice and plumb, and in some waysis a bit easier if the
posthole are a bit big, you can tamp soils back around the installed posts to tighten up. Different ground may require different
techniques but with good deep fence posts will help strengthen the final cattle
stop assembly. Once happy with the
fence posts, and while the clamps are still in place on the cattle stop I pin the fence posts to
the end beam of the cattle stop with a couple of panel pins (nails). I probably glued the joint to!
Final step is to install, glue and pin the last 8 stop rails. These overlap the sleepers on either side which is why they couldn't be installed earlier. Once all done backfill around with some basecourse and/or ballast, plus some moss saved when things where dug out and your finished. (Oh the level crossing is more ripped down Kwila decking 9x6mm. The pieces either side of the rails are shaped underneath to clear the cast in spikes and bedplates of my Aristo-craft track.)
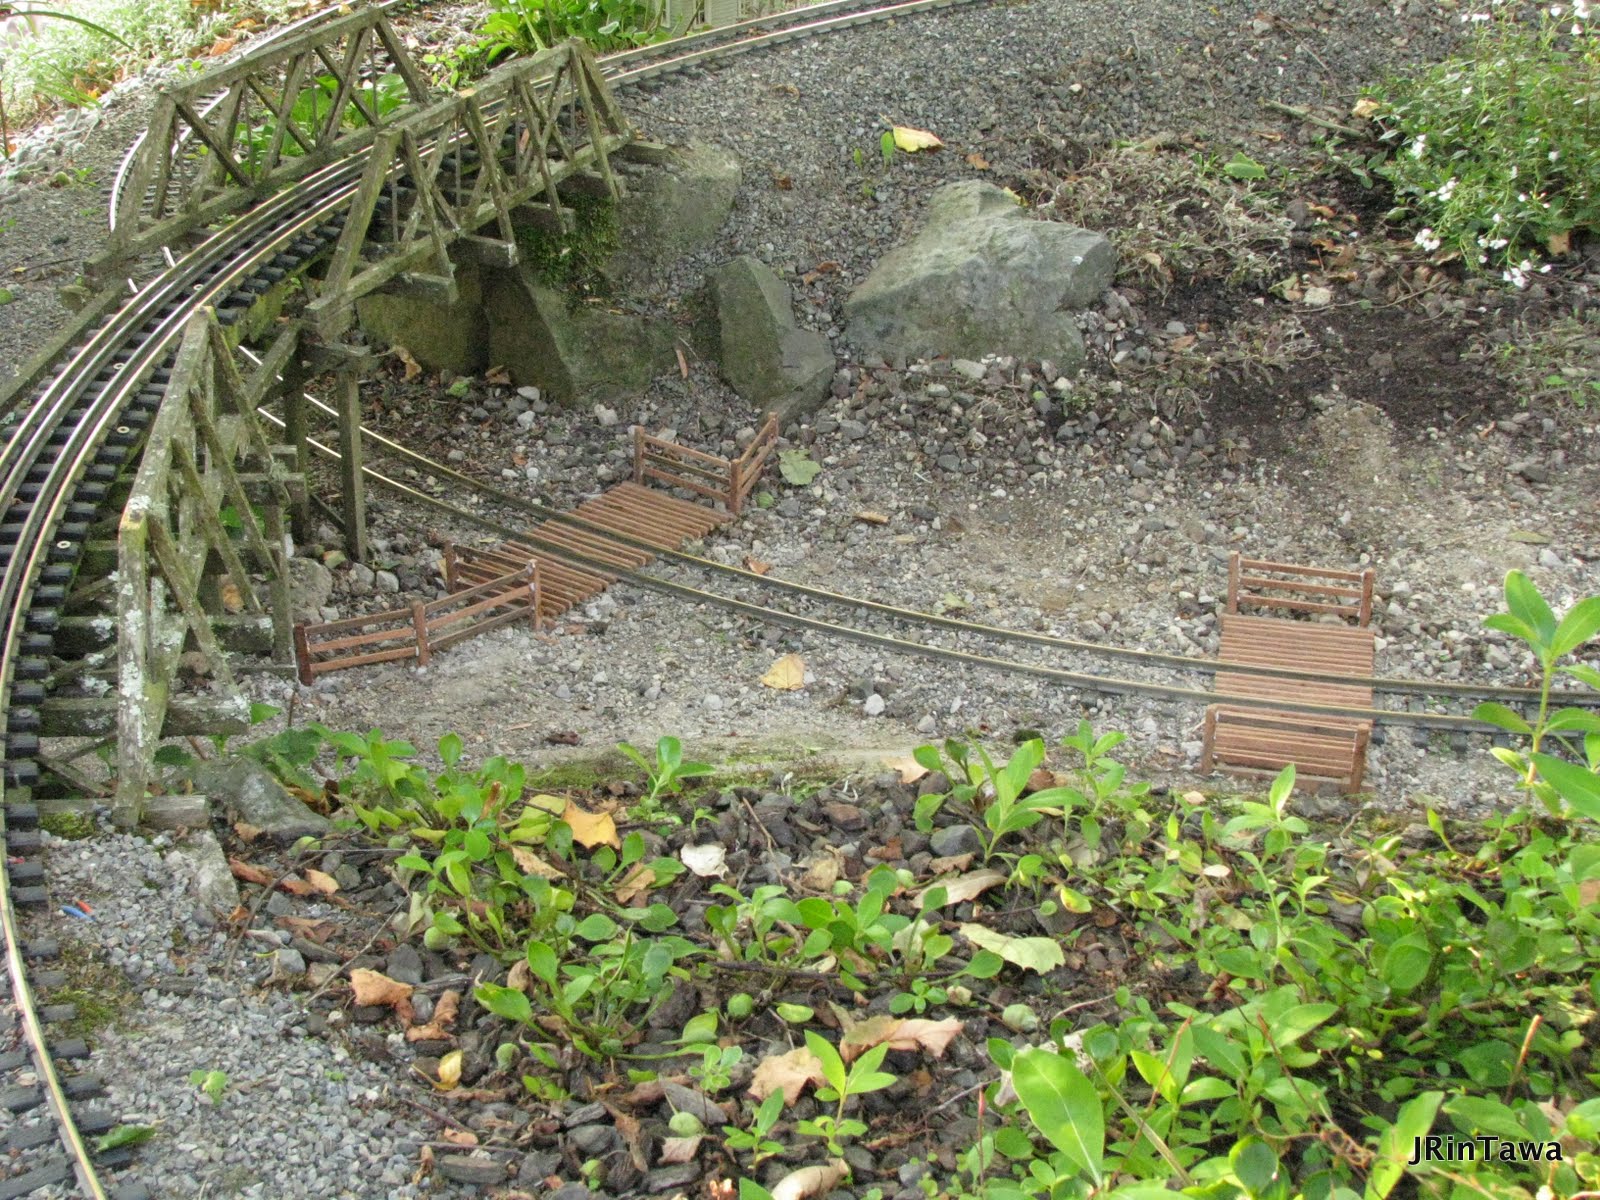
And so you now have a set of cattle stops - as easy as that!
A Second Level Crossing and Associated Cattle Stops Added 11th January 2013
Over the Christmas / New Year break I added a long planned second level crossing to lead the road under the second span of the truss bridge where the railway crosses over itself. It was a much tighter space to install the cattle stops, but with patience the same method was used with the exception of the fences which were assembled in place rather than installing as complete units.
Day One, cattle stop frames assembled in the workshop.
Day Two, trenches dug and cattle stops installed.
Day Two
Fences constructed and balance of stop bars installed.
Day Three
Fences painted, level crossing timbers added (dimples to represent bolt holes where timbers would be coach screwed to sleeps still to be done).
Day Four and a few sundry afternoons after that!
Roadway tidied up, a rock added into the garden to tidy up the bank and some extra ground covers added onto bank and we'll call it job done.
So there we are, a new photo spot, and I hope the two level crossings with the roadside rail iron and wire rope fence running alongside the road between has created the feeling of a quite country lane.
And maybe just and occasional Bush Jigger to disturb the tranquility!