|
The IST began life in 2005 several years after moving into our new home. The property afforded me (as did my wife) a reasonable space to construct a rather permanent raised bed Garden Railway. A bit of luck came my when I was gained access to a recently demolished brick mill building and thus carted off enough bricks to to realize the plan I had concocted. As I mentioned in my "philosophy' posted in the the Sidings the IST would represent a Welsh narrow gauge market line of no particular prototype. Its more bits and pieces of scenes, senses of what I experienced while visiting Wales sometime ago. Here is an overall photo giving an idea of the size and location of the Railway taken from the porch roof. You can see my wife's garden on the left (Gardens End), the woods to the right
Woods End), the field beyond (Fieldside) . Nearest the porch is Hillside Meander.
(.
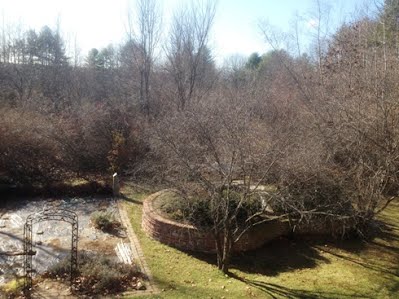 The overall length is about 32 feet and the width about 21. Average working height is 30-36 inches. The railway sits beneath several Russian Olive trees which provide enough shade for the moss and and shade loving evergreens to grow. The plantings are purposely small habit/leaves and small or none flowering.
The following photos provide a close-up tour of the line.
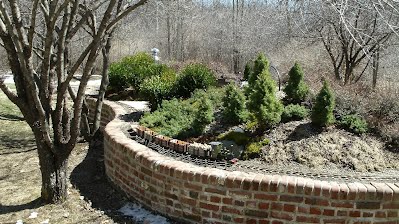
This is Hillside Meander heading off to Gardenend. The photo was taken from Woodsend in the Winter about 2 years ago.
I really like how the track meanders. The rail head is about 30 inches above ground here.
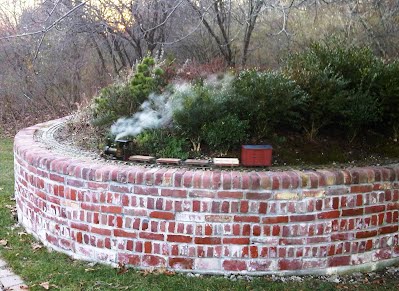
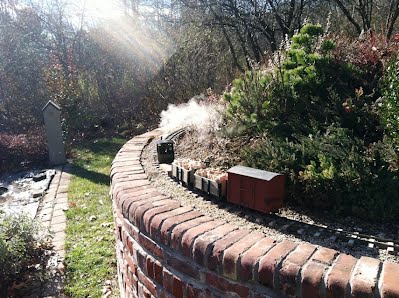
Here are a pair of photos of Gardenend. You can see that the the ground has fallen away and the track is now 3ft+ above ground. I was lucky to scavange enough "bullhead" bricks to completely cap the brick tub. I like the finishing touch. A word about the construction of the brick tub. Its foundation is some 2 feet below ground as frost around here can be very damaging to masonry work, The bricks are 2 courses thick and capped as noted. This was my first AND LAST masonry project as I was pretty much out of my element during the 2 year time it took to complete the footings, clean the bricks of old mortar, and construct the tub.
The family thought I was mad. Now having the clarity of time past, they were right! I will say though the bricks have taken on an old world mossy patina which is very pleasing.
Here are two photos of Fieldside. This is the main station, Drew Road. The photo on the left is looking from Gardenend toward Woodsend. The photo on the right is taken the other way around. You will notice some significant concrete and mortar work going on here as building pads roadways (Drew Rd making a triple crossing) and platforms take shape. I'll talk about the goods shed pictured as well as the platform construction in separate articles. A note on the track. It is hand laid, brass, code 250 flat bottom rail spiked every tie (sleeper). The ties are preservative soaked redwood pinned to a PVC wood stringer-spine base. The switches are scratch built in place. The track is about 34 inches above the ground here making operation at the station plant a pleasure on the lower back.
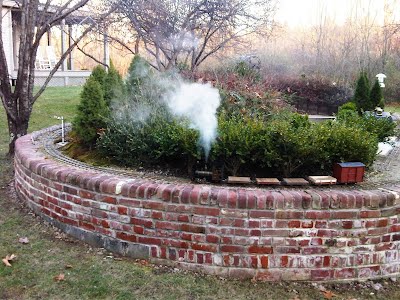
..And here we are back at Woodsend heading for Hillside Meander. The driver better mind that signal. You can see the ground come up here with the railway at its lowest point in reference to the ground but still a comfortable 2 feet or so. Also note the track itself is as level as I could manage and in fact is quite well behaved for manually controlled live steamers allowing for steady operations at a scale 7-10 MPH
12/14/13
One feature of the IST not obvious when first introduced to the line is the PIT. When visiting Jeff Young's line in Toronto Canada I was charmed by the small area in the middle of his simple loop which put the viewer in the middle of the railway. It was quite effective giving a more "immersed' perspective. When planning the IST I included this feature. It would be a triangle imbedded in the middle of the brick tub puting the viewer waist level surrounded by the railway. One leg of the triangle would be parallel to the station area facing Fieldside. Another leg facing Gardenend would have 2 sidings parallel to the leg. These would be Idlenot Sidings servicing Idlenot Coal & Farm Provisions honoring my good friend Wayne Slaughter's own Idlenot Railway, another 7/8thsn2 line. Entry to the PIT would be a walkover, Drew Road from Fieldside to a step down in the PIT. Enough words, here are several photos of the PIT.
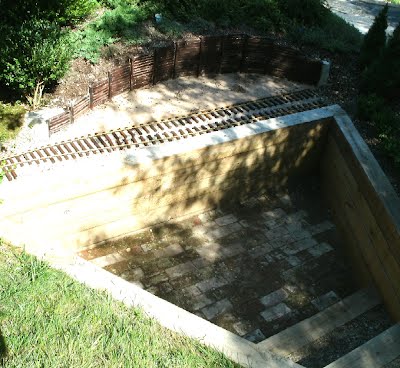
Here is the PIT. As described, a timbered triangle which puts the operator/viewer in the middle of the action. The side to the right is parallel to Fieldside and the station plant area guarded by a row of boxwoods as a view block. The sidings (Idlenot Sidings) and the retaining wall is toward Gardenend. The point of the triangle to the left points direcly at Hillside Meander where the switch to Idlenot sidings is located. The photo is taken from the grassy hillside which is the backside of the hilluck making up Woodsend. From many viewpoints around the Tramway the pit is not noticeable. In the lower right hand corner you see the walk up steps to the Drew Road walkover.
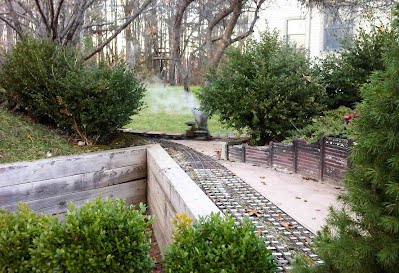
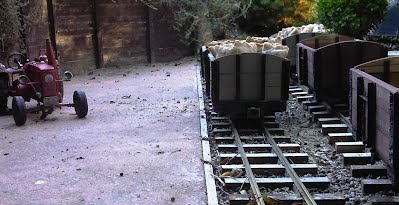
Looking from Fieldside, Drew Road Station area we see Idlenot Sidings connecting to the mainline at Hillside Meander. Ella is hustling by with what appears to be several farm produce flats. Idlenot Coal & Farm has yet to be developed in the area to the right of the Sidings.
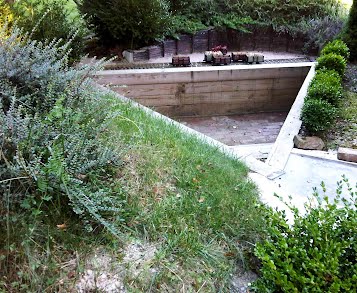
Looking over the grassy hill from Woodsend we see the PIT and the busy Idlenot Sidings. In the lower righthand corner are the PIT steps and a portion of Drew Road exiting to the right over the 3 roads of the Drewe Road station area facing Fieldside. A stepup needs to ne completed at the brick wall here to allow easy access. One of the many projects on the CME's list. If you scroll back up to the photo with the hacksaw in the foreground you will get a better picture of the Drew Road walkover.
12/22/13
Hand Laid Track. My first garden railway was laid with LGB track; indestructable, servicable but ultimately not at all the look of a well used narrow gauge line.
My second garden railway, the first Isle of Shoals was hand laid from the code 332 LGB brass rails stripped from the plastic ties. The foundation was a redwood spline topped with redwood ties, properly spaced. The rail was spiked using brass pins. Switches were scratch built in place. This track served for 5 years until a move as our new home was being built required the railway to be pulled up. The redwood had degraded significantly. The spline stringers were especially rotted and the ties not far behind.
Well, I had 4 or so years to ponder track structure survivability in Northern New England. Haunting the big box home improvement stores I saw that a plastic trim board for exterior use had taken over from pine deminsional lumber. The product touted infinite lifetime in any horrid weather it would be subjected to.
Cut into strips to make a ladder-spline base for the ties (still redwood) seemed an ideal track structure. With some photos this is how it all turned out!
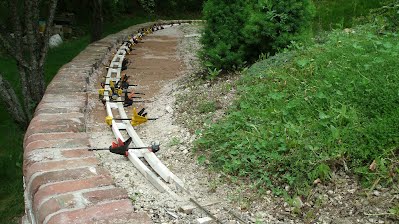
These photos show the spline under construction around Woodsend. The stringers are 3/4 square, 8 feet long ripped from 3/4 X 8 inch plastic wood as noted.
They are connected every foot by a spacer glued in place with outdoor PVC plumbers adhesive. This essentially welds the plastic into a weather proof bond.
The stringers are flexible and when constructed as a ladder permenently holds the curve they are clamped in. You do need a LOT of clamps.
The ties (sleepers) are redwood soaked in preservative and are brad nailed to the spline. I used a air powered brad gun and the tie is solidly anchored to the spline with a nail to each stringer. Tie size and spacing are, of course, to suit.
Here we are at the Idlenot Sidings switch under construction. The rail is code 250 brass and the spikes are Micro Engineering large "O scale " steel spikes shaped like the traditional US dog spike. Several track guages and spiking pliers are all the tools need for mainline track. A rail bender does come in handy but is not absolutely necessary. The rail is spiked 4 spikes per tie for the 2 rails. Rails are connected by the traditional rail joiners. After 4 + years this track structure is surviving quite well. I must admit the raised bed drains extremely well and very likely is extending the life of the ties. The spline shows no signs of degradation.
Back at Woodsend with the rail in place and ballasted with gravel fines sifted through quarter inch "hardware cloth" screen. The resultant spline sub base , track structure and compacted gravel have proven very durable. Next up will be switch building though I have kinda taken a correct the mistakes approach. |
7/8ths Scale >

