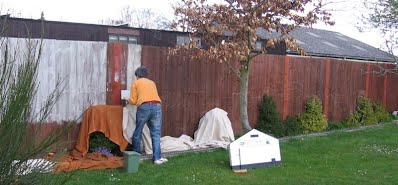
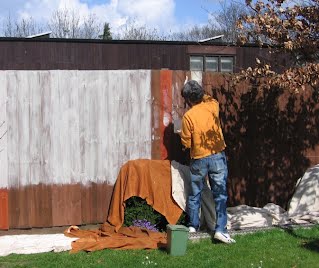
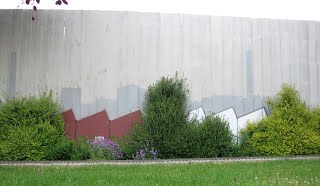
by Cheeseminer. The Flatland Washes Railway occupies the middle section of a long thin garden. Along one side is a wooden featherboard fence which separates us from the small works site next door. From time to time repairs are needed and after one such set of repairs we were left with a number of planks of a radically different colour. This was a bit distracting, and generally this fence was rather distracting in photographs. With the support, indeed encouragement, from the wife I set about painting the fence to be less obvious. Ironically this means painting it a far brighter colour! The fence had had a few coats of various brown coatings previously. The plan was to make it the same colour as the flatlandic skies. (Flatlandia does skies in bulk. The only mitigating comment ever made by locals when challenged about the lack of scenery - is that "Yes, but, the skies are nice."). Anyway... a light grey was clearly the way to go. This side of the railway is nominally at the edge of the small industrial town of Bider Fens ("by der fence".. geddit? OK. Sorry.). Therefore I wanted a hint of an industrial skyline. The first thing to do was to draw that skyline as a chalk line along the fence. It's just visible in the photo below.  I definitely did not want a detailed painting. Partly because I'd probably make a mess of it, but mostly because I did just want a background - the foreground if the railway and that's where I wanted the attention. First job is to paint the bulk of the fence in a light grey. I used Cuprinol "Garden Shades" in the lightest grey (Pale Jasmine) according to their website. The only areas I didn't paint were those to be covered by 'front' buildings made out of sheets of various materials, and down behind some of the plants. That was mainly to save on paint. Note the curtains delicately draped over the trees! Allow for several coats. I lost count but suspect there's at least three. The building silhouettes were done by adding the tiniest part of a small tin of 'Garden Shades' black to the grey and painting the skyline areas in that. It can be a bit tricky because wet paint is slightly lighter than dry, so the wet darker-grey is about the same colour as the dry lighter-grey. Do a bit and wait for it to dry in order to check the colour. With such a large area you really do only want a very small change in colour. The human eye is exceptionally good at spotting this difference and it's easy to overdo it (and it's not so easy to un-do it). Of course, with later coats on the 'building' area you can add a touch more black and paint as for a set of nearer buildings, all adding to the illusion of depth. The main outline shapes I used were those of classic 'north light' factory outlines, simple rectangles, rows of houses, and the occasional chimney. You can have great fun with the occasional bird in black, or, with a very gentle touch, smoke from the chimneys. The photo here shows the finished result. Up close, the difference between building and sky is practically invisible, but from a few yards away the result is spot on. The 'near' buildings are simply sheets of hardboard painted brick red (an old tin of 'stop rust') and white, with some painted on downpipes etc. The function of these was primarily to cover for gaps in the plant growth, so I wasn't too bothered about longevity. However, they've lasted well, but had practically disappeared behind plants, so I just moved them along to another gap. The top edge of the hardboard is wrapped over by a thin strip of self adhesive flat-roof tape, which will have protected the susceptible top edge. A few lessons learnt:
|
The Landscape > Backdrops >


