|
In the third part of the saga:
- Into the wilderness - Planning a railway: a family decision - Disaster strikes! - “I have a cunning plan...” - Ruritania reborn
Please note that more pictures of Ruritanian Railways are available in the “Albums” section of G Scale Central. Enjoy! _________________________________________________
Into The Wilderness
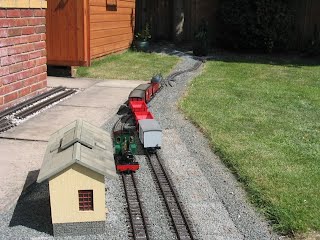
By mid-2005 we had found a new house and planned to move in August. In July, Ruritanian Railways was dismantled: six years’ work disappeared in as many days. After a last electrically-powered train, the shed access was removed, leaving a forlorn oval around which live steam operated for a further week.
Moving vans took us, G Scale and all, to the Malvern Hills to begin a new chapter. Our new house was built into a steep hillside in a profoundly rural location. A delightful place “in need of some updating”. In short, the house needed fundamental and expensive works to several rooms, including the kitchen and living room. It was also rather clear that the garden would need substantial work to get a railway in.
Bizarrely, Mrs Whatley held the view that renovating the house’s interior should be a higher priority than G Scale. After some token whining and tantrums, I accepted this and concentrated on planning the new line. A multitude of red boxes lurked in the attic while I dreamed of multi-tracked loveliness.... Planning a railway: a family decision
Based on experience from the Mark 1 layout, I had drawn up a “wish list” for the next line. Unknown to me, so had my wife, who was determined not to have the garden appropriated for a second time! In retrospect, having clear ideas and making them clear to each other was a very good idea. I definitely recommend this approach for family harmony! The proof is that "she who must be obeyed" has actively encouraged subsequent developments.
My priorities were: 1. Continuous, unattended running must be possible 2. Shunting/ uncoupling locations to be as close to waist height as possible 3. Possible train length of 3 metres (8 LGB wagons, plus Mallet): preferably longer 4. Enough sidings/ loops to cater for 5 trains to operate without removing stock 5. DCC operation, radio-controlled using LGB’s MTS system
Hers were: a) The railway would not dominate the garden b) If the railway crossed an access route, the railway would not be an obstruction c) The far side of the brook (the sunny side) would be railway-free, to ensure my daughter could play at will d) The railway’s plan would be agreed BEFORE building and not expanded without further agreement
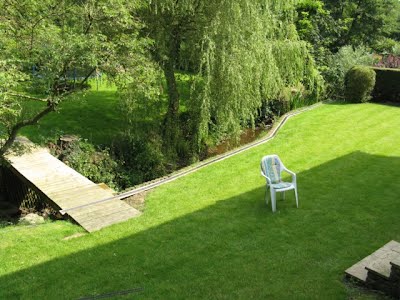
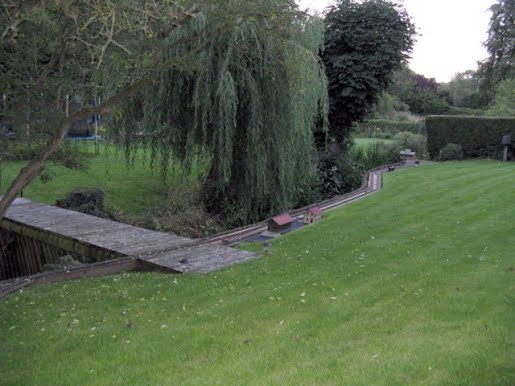
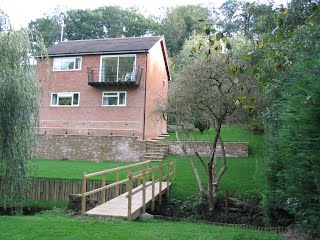
The only really contentious point was (c). I had had visions of the line majestically sweeping across the brook which bisected our new garden onto the flat piece of ground beyond: the only flat ground in the entire garden. It was not to be, though as you will read, this was probably very fortunate in the long run. So all planning would have to be based around use of the part of the garden nearest the house. To be precise, the foreground bit in the following picture:
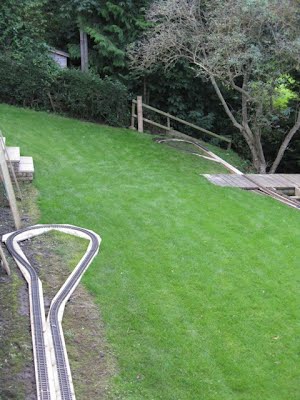
Fast forward to July 2006. The house is now renovated to Mrs Whatley’s pleasure and time and funds are available to tackle the garden. This was more than a little light weeding and pruning. The works involved a mini-digger, telegraph poles and several cubic metres of concrete and hard core, all tended to by three burly gentlemen. The works took nine weeks, but were undoubtedly worthwhile. In particular, the lower end of the garden was raised by three feet, yielding a walkway by the brook: perfect for raising live steam or shunting activities at waist level!
A pair of “before and after” photos below tell the story:
Disaster Strikes! With major works on house and garden complete, it was time to get going! However, by now we were in autumn 2006: rather late in the year, I thought, to break ground on the new line. In addition, I was mostly working abroad, which left little time for family and friends at weekends, let alone garden railways. The only G Scale running that winter would be around the Christmas tree.
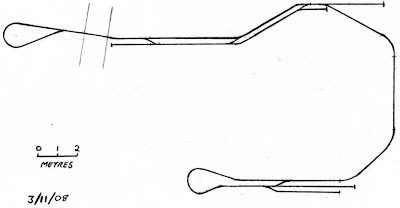
Nothing daunted, the planning process went on. Despite the levelling works, the area allotted to the potential layout still had a substantial fall. Measurements showed that a conventional oval would require gradients of up to 1 in 15 (6.7%), unless spirals were constructed. By now, I’d developed a profound aversion to concrete mixers, so an alternative plan was devised. The basic design hugged one edge of the garden, with high and low-level returns. After a deal of thought, I chose a single-track main line with return loops, rather than a straightforward continuous dogbone. Since I knew the line would be DCC, the loops were not an issue electrically and this design made providing sidings and loops easier both in terms of land used (remember – minimum impact required!) and track required. Space was left by the side of the upper loop (bottom of the trackplan) for either a shed or a seating area.
The big downside of the design was (and is) the use of radius 1 (600mm) curves for both loops. Partly this was a cheapskate idea to avoid buying new track, but it was also necessary to avoid making the line too obtrusive and to avoid some serious earthworks. Anyway, track laying would definitely start in 2007. Or so I thought before the rains came.
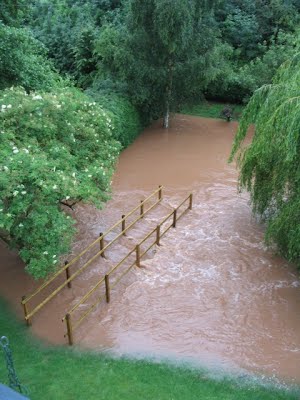
Spring 2007 was the wettest for 50 years in Worcestershire. The ground never dried out before torrential rain hit in May and June. There was scarcely a day without heavy rain. In June and July, floods affected much of southern England. The tranquil brook in our garden became a raging torrent, with catastrophic results, our garden included:
At this point, without a garden line for 2 years, I succumbed to despair. Although the bridge was quickly repaired and there was little real damage to the garden (and none at all to the house), I began to doubt whether it was feasible to build anything in the garden. The far side (the flat bit) was clearly too big a risk: the near side still sloped and was evidently prone to limited flooding. To make matters worse, LGB had gone bankrupt and G scale supplies were scant. Perhaps it would be wiser to revert to OO gauge? I needed time to think....
“I have a cunning plan...”
After much soul-searching, I decided to continue in G scale. However, it was clear that the usual construction methods would be hopelessly inadequate should further floods occur. Gravel ballast was an non-starter: it would simply wash away, taking the track with it. Breeze blocks or bricks would also be likely to move unless concreted in. Such methods would be both expensive and time-consuming and the line would still need a viaduct in one place.
After much pondering, the best solution seemed to be a wood base, using tannelised timbers and posts, firmly concreted into the subsoil. Track would be secured to the wood. Ballast could be applied for cosmetic purposes if required. It was clear that scenery would have to be kept to a minimum and fully removable against nature’s fury. Best of all, wood construction could be quick!
A few words here in favour of wood as a medium. Although it will, of course, rot as soon as exposed to any moisture, wood which has been properly treated with preservative should last anything up to 20 years before needing replacement. If it does need replacing, it’s not generally too traumatic (as I would find out...). Wood is animal resistant too. Unlike conventional ballast, birds don't peck at it for grist, cats don't do unmentionable activities in it and more rural wildlife such as moles tend to go elsewhere.
Long wooden planks will also ease natural ground undulations and bridge minor gaps without support or the need for major excavation. For longer gaps, simple viaduct structures (i.e. beams) are straightforward carpentry. Cover it with cheap roof insulation and it looks pretty reasonable too. If only I’d thought about doing that before I started tracklaying!
At this point, stupidity and haste rushed in through the door. Having waited almost 3 years, I built quickly and made some very fundamental mistakes. Notice that in the picture below (July 25th, 2008) I’ve laid one set of boards. Fine, except that all my supports are underneath those boards and there is no bracing for the parallel set which have yet to be laid. We’ll come back to that in part 4....
I did something very similar at the upper end of the line, deciding too late that I would need two sidings, not one and that both needed to be longer than the planks I’d laid in position. Doh! Note too that the planks are only 22 millimetres deep. Had I troubled to do some research, I’d have learned that all experienced garden railway gurus recommend at least 38mm depth and preferably more.
One final word of warning: if laying a railway near any vertical structure (a large wall, for example), provide some free drainage (gravel or similar) for water to soak away before it reaches your track. Compacted soil just channels it to your nice new railway. Ask me how I know...
Ruritania Reborn
Now, having confessed my sins, I should say that the wood formula worked. By August 21st, less than a month after starting, it was possible to operate trains. A ceremonial first run was made on what would become known as Pootank Pass, using a distinctly inadvisable power supply arrangement:
By August 30th, tracklaying was almost complete. Just the lower return loop and the extra siding in the upper area remained to be laid. The two loops had a difference in height of about 750mm. Despite all efforts to moderate matters, the ruling gradient would be a rather scary 1 in 20 (5%).
On September 21st, 2008, the first electrically powered train ran around Ruritanian Railways (Mark 2). As desired, the line was radio-controlled from the start using LGB’s MTS system, with all the main control gear safely housed indoors, including my venerable 1998 Type 1 MTS central station and the reversing loop module. The latter required two very long runs of wire from the module to each loop. These proved a mistake due to voltage drop, but more on that in part 4.
The picture is taken from that walkway by the brook. The track is just above waist level. That wood is nice and flat too, isn’t it? I like it when a plan comes together!
As seen, a limited amount of scenery had sprouted, but all the points were still manually controlled except for those controlling the return loops. While planning, I realised that some means would need to be found to ensure that trains always went round the loops in the same direction. This was vital, since both loops could easily accommodate two trains and a head-on collision on the lower loop would likely catapult stock into the brook!
Being a cheapskate by nature, I realised that the problem could be solved very simply by using a bridge rectifier to convert the constant AC from the track to a source of DC for the LGB point motors. The facing direction would be set by means of reed switches activated by magnets under each loco. Exiting the loop in a trailing direction through the loop point, locomotives would simply push the point blades over.
To my slight surprise, this cunning plan worked like a dream! I was so pleased that I duplicated the principle on the upper loop’s siding points. A train could arrive, pass over a reed switch which changed the point in rear then in turn allowing the train to reverse into the siding, all completely automatically. Cost per point less than a UK pound. Cool!
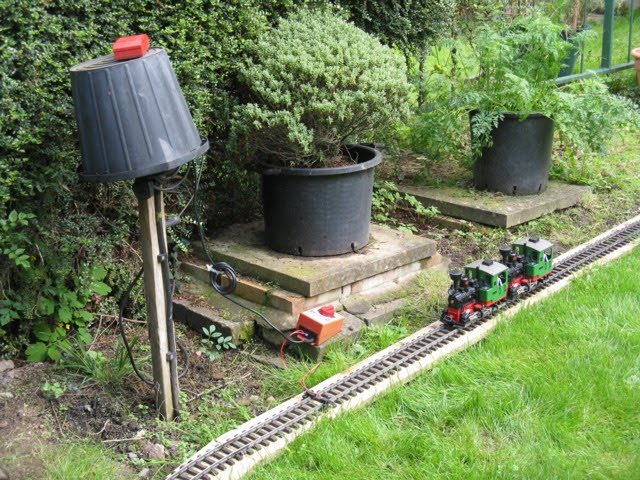
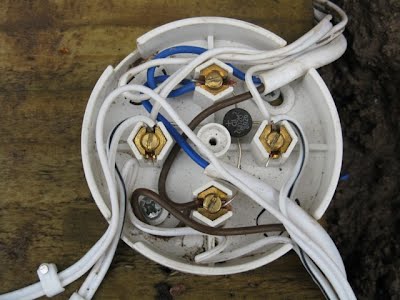
Rectifiers could easily be housed in a standard UK 5 amp domestic lighting connector and each rectifier could handle multiple points. The picture shows the rectifer (black thing in the centre) which controlled the upper loop point and two siding points. The thicker cables (UK 5 amp lighting flex) are track power feeds, the thinner ones (bell wire) are the point connections.
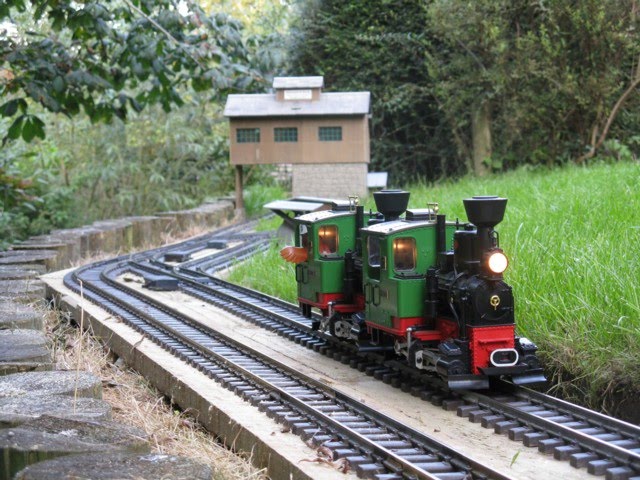
So Ruritania was reborn after three years of frustration and, at times, despair. Yet on those autumn evenings of 2008 I realised that the spark I first felt 35 years earlier (see part 1 of this saga) had never gone away. Over the next two years, that rather decrepit bit of garden in the foreground (see above in "Planning a railway: a family decision") would evolve into this:
In my (entirely unbiased!) view, there is no hobby quite as rewarding as building a garden railway. Cheers!
|
Railways > Ruritanian Railways >

%2019-12-2005-height=240&width=320.jpg)
%2019-12-2005-height=240&width=320.jpg)
0002-height=400&width=300.jpg)
